
How to Reduce Your User Count Before Purchasing a Paid Plan
If your trial included more users than you need on a paid plan, you must deactivate the extra users before checking out. This article walks you through how to do that in three steps.
If you started a trial with eight users but only need a subset on a paid plan, you will need to deactivate the unneeded users before purchasing. When you click Buy Now in the upper right-hand corner, the checkout automatically pre-fills the user count to match your current active users — in this case, eight.
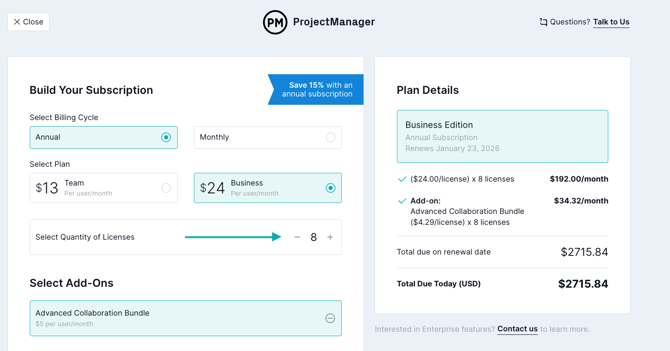
Important: If you manually reduce the user count at checkout without first deactivating users, the system cannot determine which specific users to remove. You must deactivate users on the Manage Users page before proceeding to checkout.
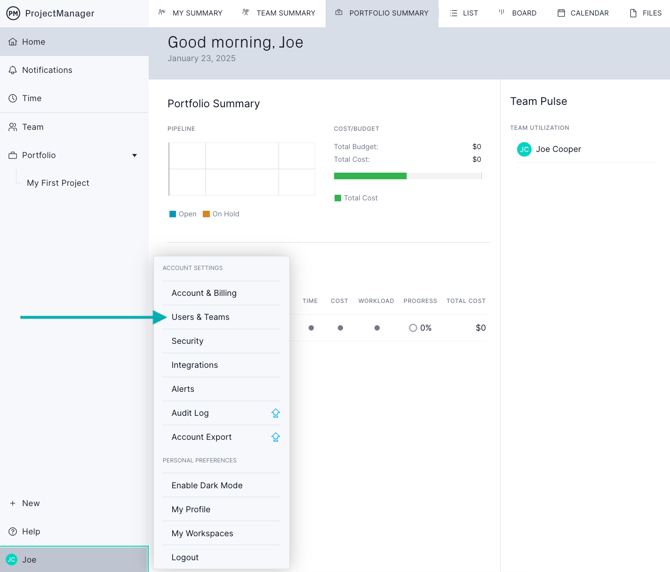
Step 1: Before purchasing, navigate to the Manage Users page to make the adjustment. To access this page, click Users & Teams in the account menu.
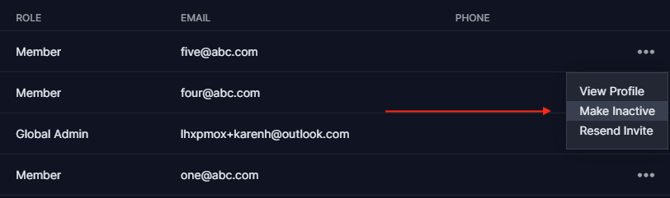
Step 2: On the Manage Users page, click the … (more options) icon next to each user you want to deactivate. A menu will appear. From the menu that appears, select Make Inactive. This removes the user from your active license count. Repeat this step for each user you do not need on the paid plan.
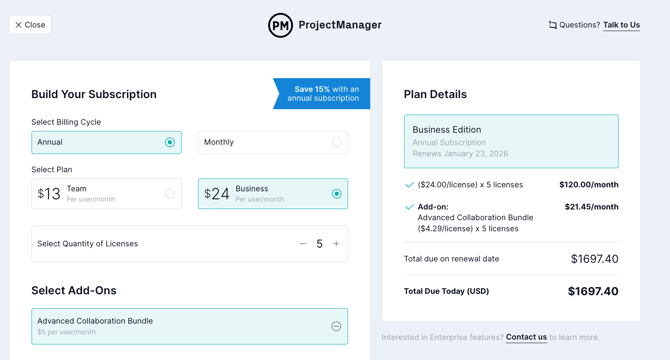
Step 3: Once you have deactivated the users who do not need paid access, return to the checkout page and click Buy Now. The user count will now reflect only your active users, and your total charge will update accordingly. In the example above, deactivating three users results in five paid licenses at checkout.
If you have additional questions, contact our support team at support@projectmanager.com.